Cycles renderer: what is it?
Cycles is a rendering engine that first appeared in Blender version 2.61 (December 2011). Cycles creates images using ray tracing, with a focus on interactivity and ease of use. It uses a node system for materials that can be used to create photorealistic materials of any complexity.
We'll take a closer look at this engine and highlight its advantages. We will also tell you how to set it up properly so that everything works like a Swiss watch.
Benefits of Cycles renderer
Here are just a few of the benefits of Cycles renderer:
- Proper dynamic lighting - this engine allows you to create realistic and dynamic lighting that changes over time. For example, you can create a sunset or sunrise effect using different light sources such as the sun, moon, stars, etc.
- High-quality volumetric light - the engine supports the creation of volumetric lighting effects that create shadows and reflections on objects. Thanks to this, you can create more realistic scenes and improve the perception of three-dimensional objects.
- Deep and detailed shadows - Cycles engine uses ray tracing algorithm to create accurate and detailed shadows. Thanks to this effect you can achieve more realistic lighting in the scene.
- Instant preview of the result - a special window allows you to immediately see all the changes made.
- HDRI - Cycles supports HDRI rendering, which allows you to create scenes with bright and saturated colors.
How do I adjust the Cycles renderer?
Before you can work with Cycles, you need to customize it. We have prepared a small guide for you on how to do this.
First, you need to adjust your preferences and hardware. To do this, go to Edit > Preferences > System. In the Cycles Render Device block, click on CUDA and check the box next to the name of your graphics card. You can also check your CPU, but that won't automatically make the renderer faster. Try different settings to see which renderer is faster for you - CPU or GPU.
Now let's get to the rendering settings themselves. Once you open the tab, you'll be greeted with the following settings.
Scene
Do the following:
- Render Engine - Specify Cycles if something else is selected.
- Device - select GPU Compute instead of CPU to have the engine use the graphics card instead of the CPU (again, this is up to you).
Sampling
Set the following parameters:
- Noise Threshold - 0.1 or higher
- Max Samples - from 10 to 50.
- Denoise - check the box.
Render
Set the following values:
- Noise Threshold - from 0.1 to 0.0001.
- Max Samples - from 128 to 1024.
- Denoise - check the box.
Something unclear? Let's get to the bottom of this.
Sample is a kind of calculation module for the engine. The more samples, the better the quality, but also the longer the rendering time. But if there are not enough samples, the image will be too noisy.
The Noise Threshold is a threshold for noise during rendering. For example, if two different samples have different noise levels, the engine decides whether to recalculate the current sample or leave it unchanged. The lower the Noise Threshold value, the smaller the difference in noise levels. If you set the value to 0, the engine will automatically choose the optimal value.
Denoise reduces the noise in the image. However, if you specify few samples, you will get a lot of artifacts in the output.
Film
Transparent - to output an image with a transparent background, check this box.
Performance
- Threads - the number of processor cores the engine will use to render the image. It's better to leave this setting at "Auto-Detect" if you don't know.
-
Memory > Tile Size - the size of the tiles into which Blender will divide the image. The default value is 2048 pixels - if the image is smaller, it will be rendered as a single block. We recommend trying different values here, starting with 128 pixels.
Color Management
This sub-item is entirely responsible for the quality of the color space and color correction. If you have experience working with image editors such as Photoshop or Lightroom, it will not be difficult to figure this out.
Light Paths
This tab is responsible for how light falls on surfaces, scatters, etc. Local settings are also responsible for things like the density of ambient effects:
- Max Bounces - the number of light bounces off different types of surfaces.
- Total - total amount.
- Diffuse - for matte objects.
- Glossy - for glossy objects.
- Translucent - for transparent objects.
- Volume - ambient effects (smoke, fog).
- For simple compositions of geometric shapes, the default values are sufficient.
Motion Blur
Motion blur settings for the animation. It is set separately for each scene.
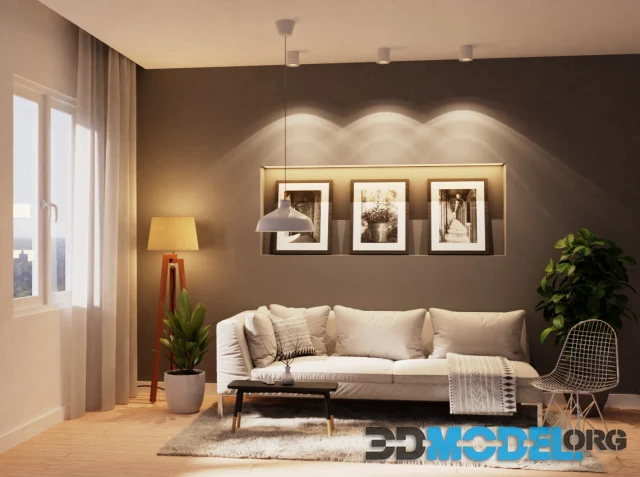
This is the most basic information about Cycles you might need. And if you need content for your game or architecture project, you can easily download it from our site. For example, we have various interior decoration things like mirrors, plaster, frames, and so on.
Ctrl
Enter
Noticed a misTake
Highlight text and press Ctrl+EnterRelated news:
Unreal Engine 5 for architectural visualization
Vray vs Corona for Architectural Rendering
Best 3D Software For Architectural Visualization
Fundamentals of 3D Lighting: Achieving Realistic Effects
Choosing the Best Render for Architectural Visualization
Using Shader Graph to Create Realistic Materials in Unity
Comments (0)
Information
Users of Guests are not allowed to comment this publication.
Users of Guests are not allowed to comment this publication.