Using Shader Graph to Create Realistic Materials in Unity
Shader Graph is an intuitive feature in Unity that lets users create realistic materials. The tool's user-friendliness and instant feedback on changes make this tool ideal for designers and engineers alike.
It can also be used to generate multiple textures with distinct properties. The Shader Graph contains several nodes which enable these types of interactions.
Please note that you can download ready-made professional textures and materials for Unreal Engine, as well as many popular 2D assets for Unity, in our Game Assets catalog. you can also choose and get free ready-made PBR materials for use in all game engines and 3D applications.
UV Mapping
UV mapping is a technique that transfers a 2D image (like a texture) onto the surface of a 3D model. This step in 3D modeling allows us to create realistic materials.
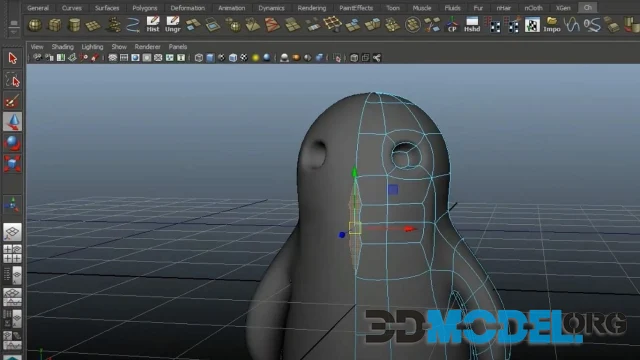
Paint on a 3D object to make it appear realistic. While this process may seem intimidating to newcomers to the industry, it's actually quite straightforward once you get the hang of it. Many leading 3D software programs come equipped with features, edit modes and object modes designed specifically to make this process simpler.
One of the most helpful tools when creating realistic materials is Shader Graph. This program allows us to design custom shaders for each component of our project, which can be particularly advantageous if we need different variants of one material for different render pipelines.
When creating a custom shader in Shader Graph, there are a few things to consider. First, ensure the target is selected correctly - either URP, HDRP or your own custom SRP. Secondly, guarantee the correct colorspace is utilized by using a colorspace conversion node.
If you experience any issues with the results of your shader, you can try altering the default values for exposed properties. Doing this may help debug and resolve any issues that may be occurring.
Once you have made the desired changes, click on the shader in Unity Editor and apply them to the model. A green tick mark should appear next to each property if successful; if not, an adjustment needs to be made.
To edit a property in the shader, right-click it and select Edit Property. This will bring up a new window with all of your changes made to that property as well as its settings. From there, you can adjust its value according to your preference before saving.
You can change the type of graph by clicking on the Graph tab and selecting a different option. All required blocks for the new type will be automatically added if you enable "Automatically Add or Remove Blocks" in Edit - Preferences - Shader Graph.
Normal Mapping
Create realistic materials in Unity using normal mapping. This technique allows for adding surface details like scratches and grooves without increasing polygon count in models, saving you valuable time on projects.
Normal mapping produces optimal results when used with an accurate Albedo texture that has both the light direction and proper surface angle. To accomplish this, simply import a photographic texture from an image editor that has been checked for bumps or other surfaces.
Another option is to generate a normal map from a grayscale image using your favorite paint program. Grayscale images are ideal because they contain specific shades of gray for regular heights and bumps, allowing you to accurately represent surfaces in your game accurately.
The issue with this approach is that light direction and surface angle information may not always be correct. This is a common issue with normal maps, particularly for isometric objects; however, you can resolve this issue by applying a height map to your textures.
Aside from that, there are some issues with normal maps you should be aware of. For instance, maps generated from 3ds Max or Maya won't work with many other applications since each program calculates tangent space differently.
This means if you want to utilize your normal maps in another application than the one they were created in, then they must be baked from a different mesh. While this may present an extra step, it can easily be avoided when using proper tools to export meshes with accurate tangent data!
Other software options that you can use include Substance Painter, which supports multiple tangent spaces and per-pixel binormals. While more complex than its simpler counterparts, Substance Painter produces an accurate normal map.
Color Mapping
Color mapping in Unity lets you add realistic details to materials. This technique is often employed in game development as it replicates the appearance of real-world materials under different lighting conditions.
Color Mapping consists of two maps: a Base Map and a Normal Map. The Base Map renders textures on materials, while the Normal Map determines surface properties like roughness or bumpiness.
In the Inspector window, you can customize the colors of both the Base Map and Normal Map. By default, they will remain white; however, you are free to change it to any other hue that suits your mood.
The texture maps on both the Base Map and Normal Map are scaled along U and V axes to fit within the mesh size. You can set this value to a high number to make the map repeat across the mesh, or to a low value to make it appear stretched atop of it.
You can scale both the Base Map and Normal Map along the Y and Z axes, so they cover the entire mesh. This is useful if your mesh is large or distorted and needs to be made more easily covered with maps.
This method is more expensive than using a Material with just an Albedo Texture, but it provides additional surface information that makes your Material appear more realistic. For instance, you could use this approach to create a Material that has a tiling pore normal map on its Albedo texture.
Furthermore, you can apply different textures to both the Base Map and Normal Map in order to define fine-grained details on material surfaces. These textures may be 2D or 3D images, containing colors and other subtleties.
In addition to the Base Map and Normal Map, you can add a height map. This helps give your Material an enhanced realism by increasing shadow depths, reflecting light more efficiently, and making it harder for light to reach corners or crevices on objects.
Transparency
If you want to create a realistic-looking material, Shader Graph can be the ideal solution. It offers various properties that let you alter how GameObjects appear, such as transparency. Plus, with this tool, you have complete control over different effects - from highly stylized to the most realistic in-game water possible!
Shader Graph is widely used for liquid effects. In this tutorial, we'll cover a variety of topics related to simulating liquids - from replicating refraction and adding waves, to creating the most realistic in-game water you can imagine.
Shader Graph not only renders various liquid types, but it can also control lighting. It supports Physically Based Rendering (PBR) and other lighting models to make materials more visually appealing.
Shader Graph offers a number of special nodes that can be employed to produce various effects. While some are more useful than others, learning them all is recommended for maximum effectiveness.
Additionally, some nodes in the Shader Graph can be edited directly through C# scripting, giving you complete control over how GameObjects look in real-time. Thus, learning how to utilize them is highly recommended.
To properly understand shaders, it's essential to first comprehend their inner workings. This includes understanding the relationship between Vertex and Fragment stages within a shader.
To begin, select a node in the Shader Graph and click Create Node. This will add an output port that can be connected to another node - such as Texture Port, Color Port or Output port used for applying shaders onto GameObjects.
Once you've created a port, you can connect it to another node by right-clicking and selecting "Add" from the dropdown. Alternatively, if it is a texture port, click the 'texture' button next to it for settings of its data type.
When using a Color Port, you have two options for displaying its color: as its own separate hue on the GameObject it's attached to, or as an RGBA image. The latter could be more suitable for certain effects like alpha testing.
Other posts:
- Texturing in Blender
- The DLSS, FSR and NIS methods of scaling resolution in games: features, advantages and disadvantages - LINK
- Unity: features, pros and cons - Link
- Unity VS Unreal Engine - source
Ctrl
Enter
Noticed a misTake
Highlight text and press Ctrl+EnterRelated news:


Comments (0)
Information
Users of Guests are not allowed to comment this publication.
Users of Guests are not allowed to comment this publication.