Anatomy 360: High-quality Photographic References
Anatomy 360 – a dream come true?
For newbies, this app may be a tough nut to crack. Lots of functions in a huge menu list. How to use it? Practice. And practice again. Why is it worth your time to learn this program? We will tell you further.
The idea behind Anatomy 360 was to get the most out of viewing/highlighting/rendering scans from any angle. This program does not require excessive requirements for computer hardware, which has increased its popularity.
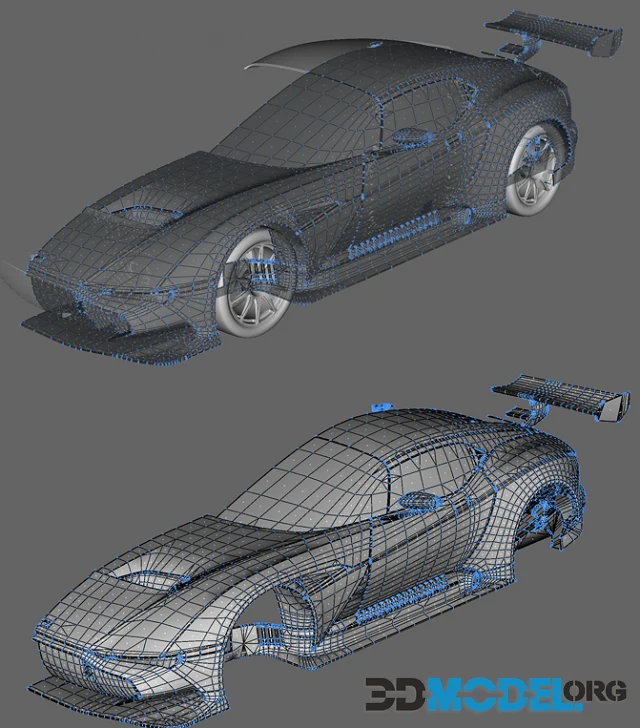
3D visualization is much more interesting since it is possible to realize an image/object and view it from all angles, from any viewing point. This is as convenient as possible and accordingly improves the quality of the created product. Access to changing virtually every detail of a design opens up unlimited possibilities and gives the artist endless scope for experimentation and creating an endless number of different materials in a single scan.
Although initially, this application was planned to be a tool for creating visual effects and characters. But the developers decided to take a “step forward” and created Anatomy 360. Professional artists, sculptors, and editors use the functions of this application every day, and we don’t even always realize that we see the results of their work every day.
Anatomy 360 Basic Tools
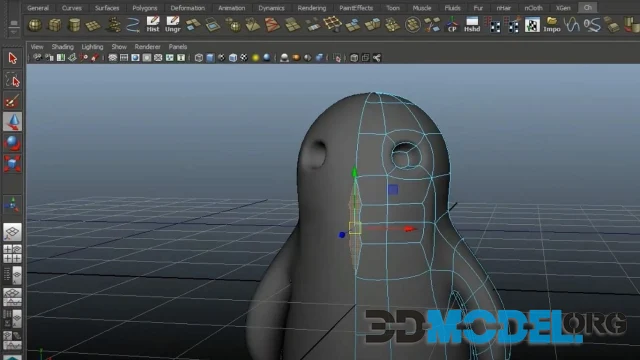
The main functions of the program are related to the manipulation of three-dimensional images.
The developers have filled the program with many convenient and necessary tools:
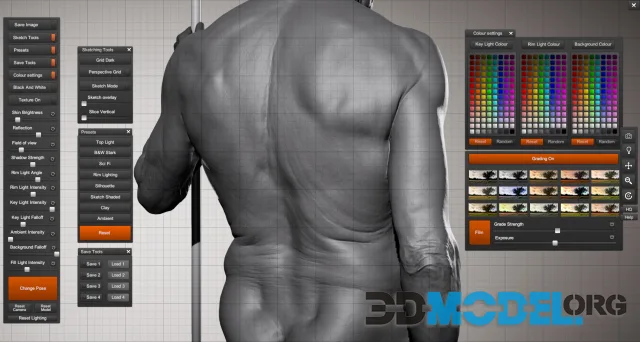
- Lighting/Lighting Tool - The user selects the desired key, rim, or fill light settings. This speeds up the process of setting up dynamic lighting. This is an almost virtual photo studio with unlimited shooting possibilities.
- Selection of movements – despite the limited number of poses, the process itself is unique due to its increased frame rate. This means that the shooting recorded every slightest change in the position of the object, i.e. it is a stop-motion animation process.
- Tools for working with sketches
Dynamic sketch mode
• Sketch mode lets you create line art-style images with dynamic shadows at the touch of a button.
3D perspective mesh
• Available 3D perspective grid will facilitate foreshortening workflow and provide accurate perspective.
Switchable textures
• The application has a convenient feature to easily switch between textured and non-textured models, making it easier to view the main shape.
Dynamic lighting
• Create unique lighting variations with the Anatomy 360 lighting toolset. The set includes controls for frame, fill, key, and ambient lighting.
"Save Tools" function
• Stores modes with specified lighting/shading and color settings and allows you to apply them at any time
Color management and gradation
- The application's palettes are so diverse that they will satisfy the needs of even the most demanding user. Includes a complete set of tools for working with them.
- Perspective window – a mode for working with angles and developing a complex perspective. It is very convenient to use the large field of view function if necessary.
- Function for creating a model outline
Slice tool
Cuts an object in a horizontal plane. At any specified location. This opens up access to a detailed study of the object in 3D.
Color correction tools allow you to evaluate a scene using a set of predefined lookup tables. This is most convenient when creating beautiful renders without the help of third-party applications, such as Adobe Photoshop.
Not all features are available in Anatomy 360 yet, but the program's creators are developing and uploading updates as they become available. Therefore, a library of thousands of scans is waiting for you.
Everything is available for free and without registration. Our content is selected for maximum user convenience. Don't miss the rest of the collections. We will cover 3D models, templates, 2D content and much more.
Ctrl
Enter
Noticed a misTake
Highlight text and press Ctrl+EnterRelated news:


Comments (0)
Information
Users of Guests are not allowed to comment this publication.
Users of Guests are not allowed to comment this publication.